Learning how to take photos for eBay really just comes down to one thing: creating images that build trust and visually answer every question a buyer might have. Your photos are your entire sales pitch. In a crowded marketplace, they’re the single most important part of turning those old items into cash.
More than that, taking great photos can be the key to breaking through that "clutter paralysis" we all feel when looking at boxes that have been sitting there for years.
Why Better eBay Photos Mean Faster Sales
Have you ever stared at a pile of stuff you want to sell and just felt… stuck? It's not the items themselves; it's the thought of everything involved—taking pictures, writing descriptions, shipping. That feeling of being paralyzed by decisions is real, and it’s why those boxes can sit around for months, even years. It's not laziness, it's decision fatigue.
Here's the trick I’ve learned: great photos are a powerful way to build momentum. When you take a crisp, bright picture of an item, you're doing more than just prepping a listing. You’re taking a tangible step forward. Each good photo feels like a quick win, giving you a little dopamine hit that makes the whole process feel manageable instead of impossible.
Turning Clicks Into Confidence
Think of your eBay photos as your digital handshake. In a real store, a customer can pick an item up, check its condition, and feel the quality. Online, your pictures have to do all of that work for them. They are, without a doubt, what separates a quick sale from a listing that just sits there.
The real power of a good photo is its ability to build instant trust. A clear, well-lit image signals that you're a serious, honest seller. It gives a potential buyer the confidence to hit 'Buy It Now' without a second thought.
You don't need to be a professional photographer. This is all about learning what buyers look for and giving it to them, plain and simple. Tiny tweaks to your setup can transform a blurry, unappealing snapshot into one that stops scrollers in their tracks.
Even the most common photo mistakes are surprisingly easy to fix. Little changes can take an image from "blurry" to "buyable" in seconds.
Quick Photo Fixes From Blurry to Buyable
| Common Mistake | The Easy Fix | Why It Works |
|---|---|---|
| Dark, shadowy photos | Move near a window (natural light). | Natural light is soft and even, eliminating harsh shadows and showing true colors. |
| Busy, distracting background | Use a plain white or gray poster board. | A neutral background forces the buyer's eye to focus only on your item. |
| Blurry or out-of-focus shots | Tap your phone's screen to focus. | This tells your phone's camera exactly what to make sharp and clear. |
| Only one or two pictures | Take shots from every angle, plus close-ups. | More photos answer more questions and prove you have nothing to hide. |
These simple adjustments remove doubt from a buyer's mind and make your listings look far more professional and trustworthy.
Standing Out in a Crowded Marketplace
The sheer scale of eBay is why your photos are non-negotiable. At any given time, eBay has between 2 to 2.4 billion active listings for its 134 million active buyers. In that gigantic digital aisle, your main photo is your one shot to grab someone's attention and make them click on your listing over the countless others.
Ultimately, learning how to take photos for eBay is a skill that pays you back directly. It gets your items sold faster, cuts down on questions from buyers, and gives you the momentum you need to finally make progress on that clutter.
For more ideas on which items sell best, take a look at our guide on what sells fast on eBay.
Your 5-Minute At-Home Photo Setup
Let's get one thing straight: you don't need a professional studio to take photos that sell. Not even close. In fact, some of the most effective eBay photos I've seen were taken with simple setups that took less than five minutes to pull together, using things found around the house.
The whole point is to create a simple, repeatable process. Once you have a designated spot, you can fly through an entire box of items in one go. This is how you turn that pile of "stuff to sell" into actual, live listings and build momentum, not perfection.
Find Your Light Source
Light is everything in photography. Everything. The best kind is free and available every single day: natural light from a window.
Find the biggest, brightest window in your home and set up shop next to it. A small table, a chair, or even a clear patch on the floor will do just fine. What you're looking for is indirect sunlight. Direct, blazing sun creates harsh, ugly shadows that hide details.
If the sun is beaming straight in, just hang a thin white bedsheet over the window. This instantly turns that harsh light into soft, even light that wraps around your product beautifully. It’s a cheap, pro-level trick.
My #1 Tip: Turn off all the other lights in the room. Seriously. Lamps and overhead lights will mix with the natural light and cast a weird yellow or blue-ish tint on your items, making them look grimy. Let the window do all the work.
And please, never, ever use your phone's built-in flash. It's the fastest way to make something look cheap. It creates a nasty glare, flattens the item, and completely washes out the true colors.
Choose Your Background Wisely
The best background is one a buyer never notices. You want their eyes locked on your item, not on your cat walking by in the background or the pattern on your kitchen table. A busy, cluttered background just screams "amateur."
A plain, neutral background is your secret weapon. Here are a few dead-simple options:
- White Poster Board: This is the undisputed champion for small- to medium-sized items. Grab a couple of sheets from the dollar store—it’s the best buck you'll ever spend on your selling business. You can even curve one up against a wall to create that slick, seamless "infinity" look.
- A Plain Wall: Got a neutral-colored wall? White, gray, or even a light beige works great, especially for larger items. Just give it a quick wipe to make sure there are no scuffs or marks.
- A Solid Bedsheet: In a pinch, a plain white or gray bedsheet pulled tight will work. Just do yourself a favor and iron out the major wrinkles first, as they can be surprisingly distracting.
Consistency is what separates the pros from the rest. Using the same simple background for all your photos makes your entire store look clean and professional. It tells buyers you’re a serious seller who pays attention to the details.
Set Your Stage for Success
Alright, let's pull this all together. Here’s how you assemble your mini-studio in about two minutes.
- Position Your Surface: Place your table or lay your poster board on the floor right next to your window.
- Create the Backdrop: If you're on a table, lean a poster board against the wall. On the floor, you can prop it up with a box. For that seamless effect, gently bend the poster board so it curves up from the floor onto the wall. No sharp corners.
- Place Your Item: Set your item down in the middle of your setup. The light from the window should be hitting it from the side. This is key, as it defines the item's shape and texture without creating those distracting, harsh shadows.
And that's it. This little setup is now your official selling station. Once it's ready, you can start batch-processing your items. Mastering this part of how to take photos for eBay is all about building a system that helps you finally make progress, turning those boxes in the corner into cash in your pocket.
Capturing the Essential Shots Every Buyer Wants to See
On eBay, a buyer can’t just pick up your item, feel its weight, or inspect the details for themselves. Your photos have to do all that heavy lifting. They're your number one tool for building a buyer’s confidence and answering their questions before they even think to ask. Knowing which shots to take is the real secret behind how to take photos for eBay that actually sell.
A complete set of pictures tells a story, leaving no room for doubt. This isn't about being a professional photographer; it's about being thorough. When a potential buyer feels like they’ve seen an item from every possible angle, they trust the listing—and you—so much more. As a bonus, this process forces you to inspect the item closely, which helps you write a far more accurate description.
Your Non-Negotiable Shot List
For pretty much anything you're going to sell, a core set of photos will cover all the essential bases. Think of this as your starting lineup—the shots you absolutely must have to give someone a complete picture.
- The Hero Shot: This is your main photo. Get the item front and center, brightly lit, and perfectly in focus. Make that first impression count.
- The Full Back: Simply turn it around and show the entire back. Buyers need to see that there are no hidden surprises.
- Both Sides: Capture the left and right profiles. This is crucial for showing the item's true shape and condition from all viewpoints.
- Top and Bottom: Don't skip these! They're often where you'll find key info like model numbers on electronics or maker's marks on collectibles.
This basic shot list does more than just show the item; it proves you have nothing to hide. It’s a powerful, unspoken signal to buyers that you are a transparent and trustworthy seller, which can be the deciding factor in a competitive listing.
Once you have these foundational shots locked in, it's time to zoom in on the details that truly sell the product.
Highlighting Key Details and Textures
This is where you show buyers what they’d look for if they were holding the item in their hands. Close-up shots are your best friend for showcasing quality and justifying your price.
Get detailed pictures of:
- Brand Logos and Tags: This is all about authentication. Get a crystal-clear shot of any logos, designer names, or material tags.
- Unique Textures: Is it a chunky knit sweater or a smooth leather bag? A close-up that shows the material's texture helps a buyer imagine what it actually feels like.
- Special Features: Buttons, zippers, unique clasps, or any interesting hardware should get their own dedicated photo.
The visual side of selling is so critical that eBay itself has poured resources into it. The platform's investment in AI-powered listing tools is a dead giveaway. In fact, over 10 million sellers have already used eBay's AI image-to-listing tool to create more than 200 million listings. The trend is clear: great visuals drive sales.
The Honest Approach to Flaws
Here’s a secret that the best sellers live by: photographing flaws builds massive trust. It feels backward, I know, but showing a small scuff, a tiny stain, or a loose thread is one of the smartest things you can do.
Why? It shows honesty and manages expectations from the get-go. A buyer who knows about a small flaw before they click "buy" is a happy customer. A buyer who discovers an undisclosed flaw is a future return and negative feedback waiting to happen.
Always include a clear, well-lit close-up of any imperfection, no matter how minor. If it helps, point to it with a pen tip or place a coin next to it for scale. This simple act of transparency is your best defense against "item not as described" claims, saving you time, money, and headaches. You can find more strategies like this in our guide to selling unwanted items online.
This quick flow chart breaks down a simple at-home setup. All you need is a good light source, a clean background, and your item.
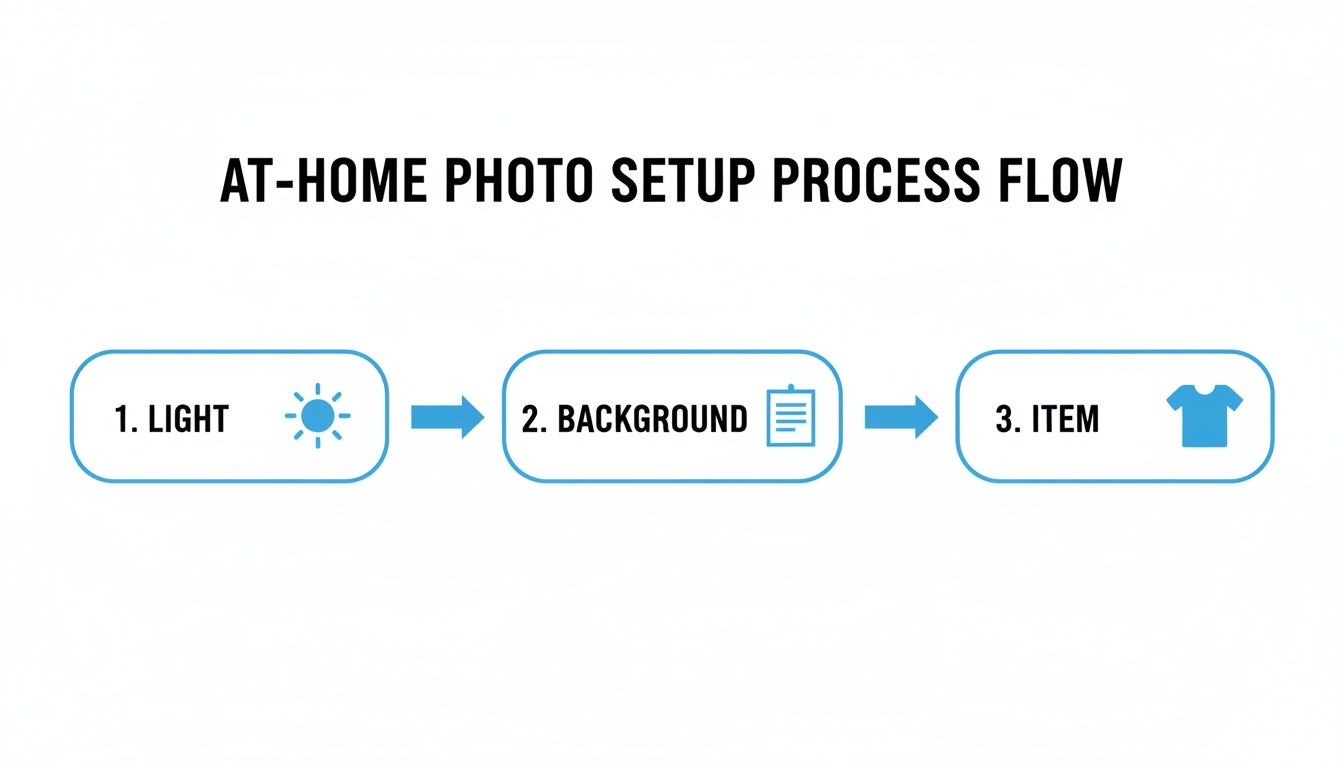
Following a straightforward process like this is the key to getting consistent, professional-looking photos every single time.
Quick Smartphone Edits That Make Your Photos Pop
You've got your shots. The angles are good, the lighting worked out, and you have a whole set of photos ready to go. You could just upload them as they are, but spending an extra 30 seconds on a few simple edits can be the difference between a listing that sits and a listing that sells.
Don't worry, you don't need Photoshop or any complicated software. Everything you need is already in your smartphone’s built-in photo editor.
Think of it this way: this final touch is what separates the casual sellers from the serious ones. A quick crop or a small brightness bump makes your product look cleaner and more professional, which builds instant trust with a potential buyer. It’s a tiny bit of effort that can help you sell faster and for a better price.
Master These Three Essential Edits
When you open your phone's photo editor, it’s easy to get overwhelmed by all the sliders and options. Ignore them. To make a real impact, you only need to focus on three simple, powerful adjustments.
- Crop & Straighten: This is your most powerful tool. The goal is to make your product the absolute hero of the image. Crop in tight, getting rid of any distracting background or empty space. While you're at it, tap the straighten tool to fix any slightly crooked angles. A perfectly level photo just feels more professional.
- Brightness (or Exposure): Most photos taken indoors can use a little lift. Nudging the brightness up a bit makes colors look more accurate and whites appear crisp and clean. The trick is to not overdo it—you want the item to look bright, not like it’s glowing in the dark.
- Contrast: Right after brightening, add a tiny bit of contrast. This subtle adjustment makes the dark parts of your photo a little darker and the light parts a little lighter. It stops the image from looking flat or washed out and gives it a satisfying "pop."
Think of these edits like tidying up a room before guests arrive. You're not renovating the house; you're just making small adjustments that create a much better first impression. A few taps can transform a dull photo into one that grabs attention.
Develop a Fast Editing Workflow
The key here is speed and consistency. You want this to be a quick, repeatable process, not a chore that slows you down. After editing a few sets of photos, you'll develop a feel for the right adjustments and be able to fly through an entire batch in just a minute or two.
As you get into the rhythm of editing, it’s also smart to learn how to compress images without losing quality. This ensures your beautiful, sharp photos load quickly for buyers on any device.
Your Smartphone Editing Checklist
Here’s a quick-glance table to guide your edits. Run through these steps for each of your main photos to create a consistent, polished look for your entire eBay listing.
| Editing Step | What It Does | Pro Tip |
|---|---|---|
| 1. Crop Tightly | Removes background noise and makes the item the clear focus. | Leave a thin, even border of background space around your item for a clean look. |
| 2. Straighten Angle | Corrects any tilted horizons or crooked lines for a professional feel. | Use the gridlines in your editor to align the item with the vertical or horizontal axis. |
| 3. Boost Brightness | Makes the photo look cleaner and more appealing. | Increase it just until the item looks true-to-life and bright, but not blown out. |
| 4. Add a Touch of Contrast | Adds depth and makes the image "pop" so it doesn't look flat. | A very small adjustment is all you need. Nudge it up just a little. |
Sticking to this simple routine is the final step in mastering how to take photos for eBay. It’s what makes all your prep work pay off, leaving you with images that look fantastic, build buyer confidence, and get your items sold.
Making Sure eBay's Algorithm Loves Your Photos
Taking a great picture is just the first hurdle. The real trick is making sure eBay’s search algorithm actually shows that picture to potential buyers. This part isn’t about creative flair; it’s about understanding the simple technical details that help your listing get seen, turning your decluttering efforts into a faster sale.
Think of the eBay algorithm as your first customer. Before a real person can buy your item, the algorithm has to "buy into" your listing. It rewards listings that look trustworthy and professional, and a huge part of that comes down to your photos meeting its preferred standards.
Following eBay’s Technical Rules
First, let's get the non-negotiables out of the way. eBay has some simple ground rules for photos to make sure every buyer has a good experience. Ignoring these can get your listing buried or even prevent it from going live.
Your photos absolutely must be:
- At least 500 pixels on the longest side. Honestly, just aim for 1600 pixels to give buyers a fantastic zoom experience.
- In a standard format like JPEG, PNG, or GIF. Your phone's camera already does this, so no need to overthink it.
- Free of any added borders, text, or logos. Let the photo of your item do the talking.
Meeting these minimums is the price of admission. It’s a simple checklist that ensures your images are clear and look good on any device, from a phone to a desktop.
A Small Trick for Image File Names
Here’s a quick win that most sellers completely overlook. Before you upload your photos, take thirty seconds to rename the files on your computer or phone. Instead of uploading a generic file like IMG_8675.jpg, give it a descriptive name.
For instance, a much better file name would be vintage-levis-501-jeans-size-32-front.jpg.
While the direct SEO impact of this on eBay itself is debated, it's a solid best practice for image optimization everywhere else on the web. It costs you nothing and gives search engines a clue about what your image contains. Beyond just taking the shot, learning to optimize images for web is a great skill that helps with faster loading times and better overall performance.
Connecting Photos to Buyer Behavior
Now for the most important part. eBay’s algorithm is smart; it's designed to promote listings that actual buyers are interested in. Your high-quality photos directly influence the very behaviors that the algorithm tracks and rewards.
A great set of photos makes buyers click on your listing, spend more time examining the details, and ultimately, feel confident enough to make a purchase. These actions signal to eBay that your listing is valuable, prompting the algorithm to show it to more people.
The competition for eyeballs on eBay is fierce. Just look at their advertising ecosystem. In a single recent quarter, eBay generated $525 million in ad revenue, with about 1.2 billion of the platform's 2.4 billion listings being promoted. When 4.4 million sellers are paying to boost their items, it’s crystal clear that great photos are the non-negotiable foundation for any successful listing.
Ultimately, optimizing your photos for eBay isn't about gaming a system. It's about providing an excellent customer experience. Clear, detailed, and technically sound photos build the trust that leads to clicks and sales—the exact signals the algorithm is built to find. This is the final, crucial step in your photography process, and it sets the stage for everything that comes next, including pricing. If you need help with that, check out our guide on how to price items for resale.
Common Questions on Taking Photos for eBay
Even after you've got a game plan, it's totally normal for questions to pop up. You're in the middle of a session, and suddenly you hit a snag. Getting stuck on a small detail is often just enough to bring back that dreaded "clutter paralysis" and kill your momentum.
Let's tackle some of the most common questions I hear from sellers. The idea here is to give you quick, no-nonsense answers so you can keep moving forward and finally make progress.
Is My Smartphone Really Good Enough for eBay Photos?
Yes, absolutely. In fact, for most people selling on eBay, a modern smartphone is not just "good enough"—it's often the best tool for the job.
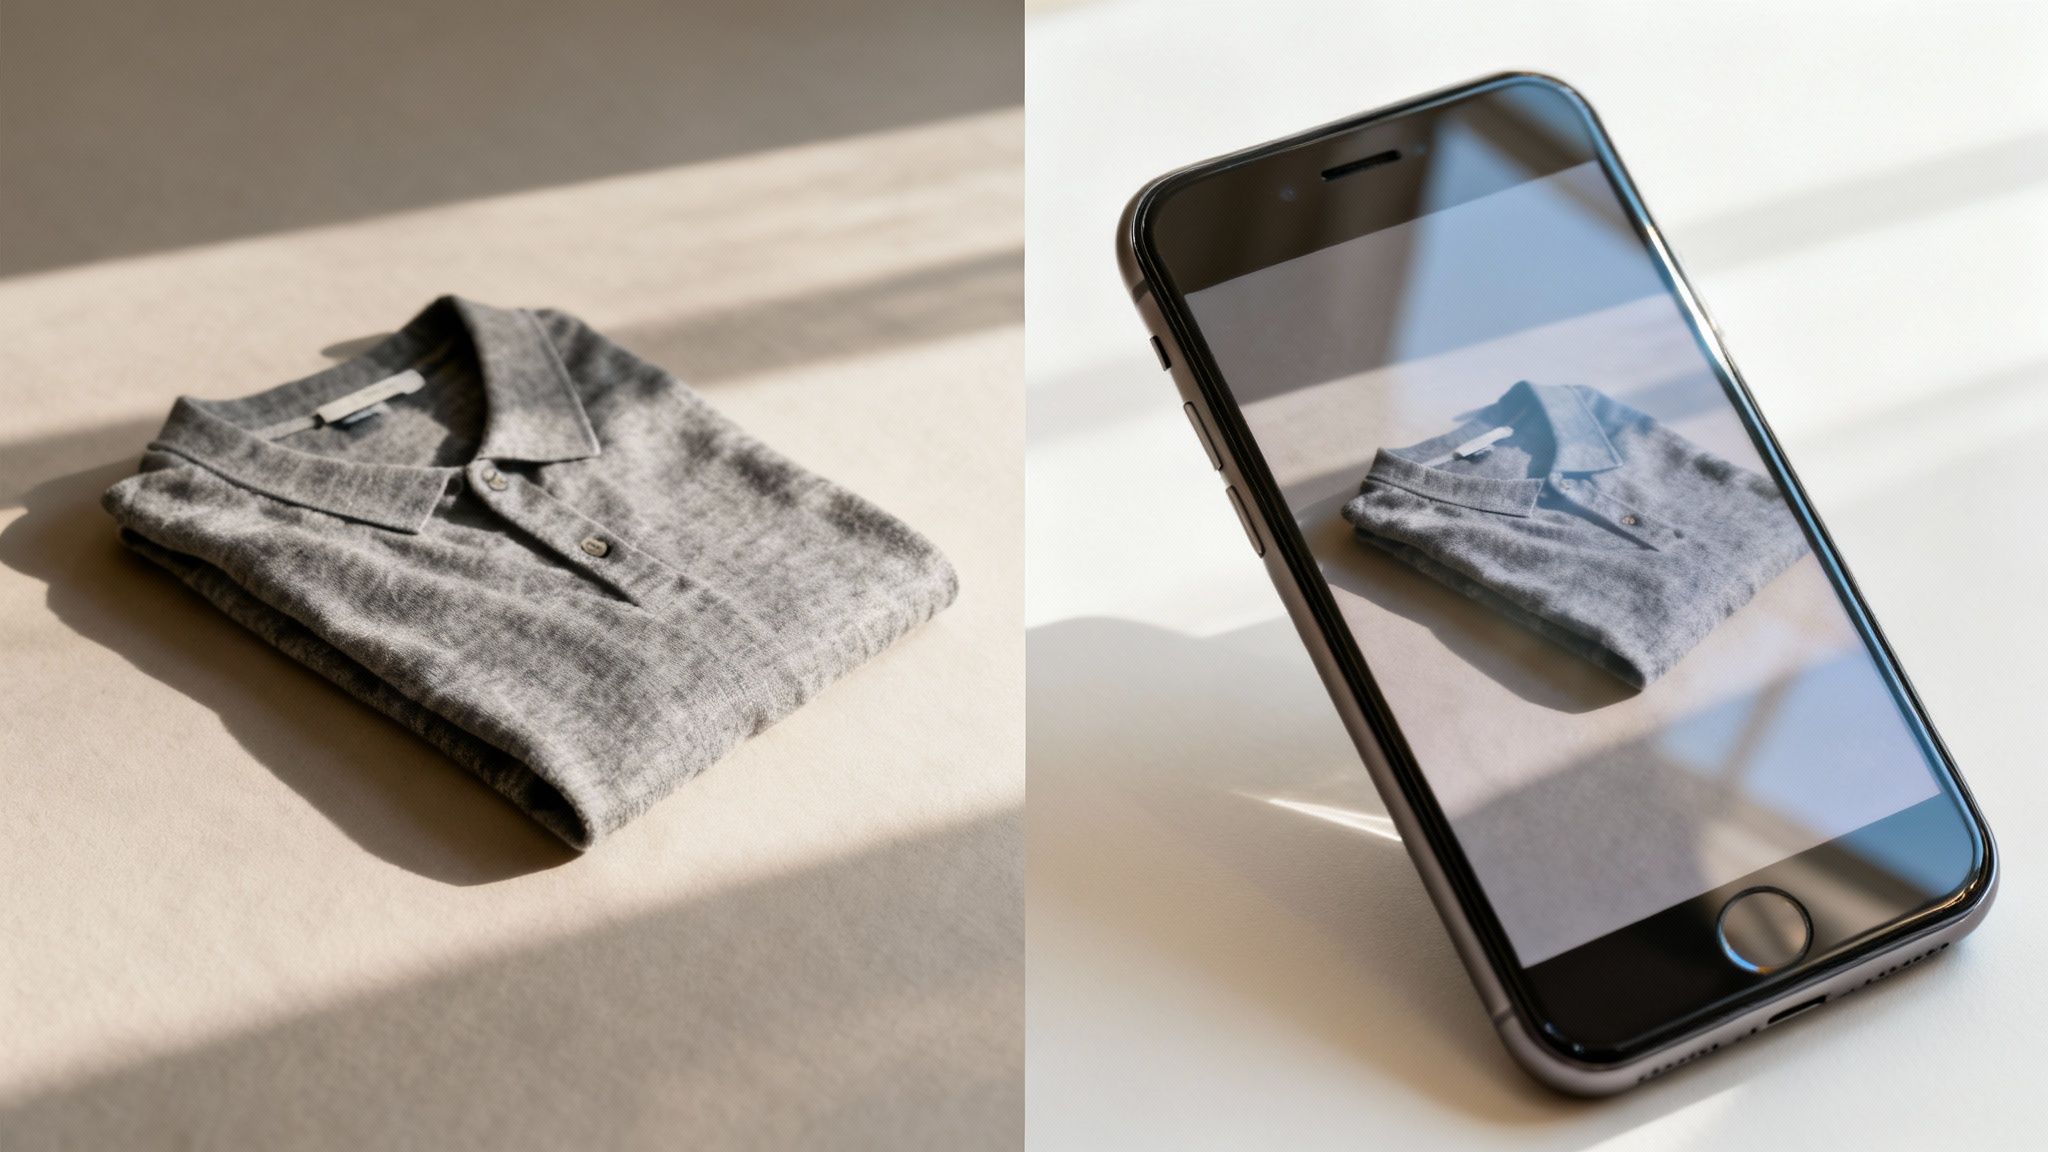
The quality of today's phone cameras is incredible. The real secret to great photos isn't a fancy, expensive camera body; it's how you use what you've got. Focus on good lighting (natural light from a window is your best friend), hold the phone steady to prevent blur, and always give the lens a quick wipe with a soft cloth before you start. The ability to shoot, do a quick edit, and upload all from one device is a huge time-saver.
How Do I Photograph Shiny Stuff Without That Awful Glare?
Ah, the classic problem. Photographing anything reflective—jewelry, glass, chrome, even glossy book covers—can feel like a nightmare. The trick is to stop thinking about direct light and start thinking about diffused light. Harsh, direct light is what causes those distracting hotspots and reflections.
To get that soft, even lighting, you can:
- Wait for an overcast day. The clouds act like a massive, free softbox, scattering the sunlight perfectly. It’s nature’s professional lighting setup.
- Bounce the light. If you have to shoot on a sunny day, move your item out of the direct sunbeams. Instead, place it in a bright spot and use a simple piece of white poster board to bounce the soft, ambient light onto it.
- Watch your angles. Look closely at what's being reflected in the item's surface. Sometimes, just shifting your position a few inches to the left or right is all it takes to make your own reflection disappear.
Whatever you do, resist the urge to use your phone's built-in flash. It's a one-way ticket to a harsh, ugly glare that makes your item look cheap. Soft, indirect light is always the way to go.
What’s the Best Way to Show How Big (or Small) an Item Is?
This is a big one. A photo can be deceiving, making a small trinket look huge or a large piece seem tiny. Giving buyers a clear sense of scale is one of the most important things you can do to prevent misunderstandings and returns.
The clearest, most professional way to do this is to include a ruler or measuring tape in one of your shots. Just lay it cleanly next to the item. This gives the buyer objective, hard numbers, leaving no room for guesswork.
If you need a quick visual reference, a common object like a coin can work in a pinch. Just make sure you say what it is in your description (e.g., "Quarter shown for scale"). Try to avoid using your hand; it's not a standard unit of measurement and can just be distracting.
How Many Pictures Should I Take for My Listing?
My rule of thumb is simple: use as many photos as it takes to tell the entire story of the item. eBay gives you 24 free photo slots, and you should see that as a target, not a limit. More photos build buyer trust and confidence.
For most things, 8-12 photos is a great number to aim for. That’s plenty of room to cover all the bases:
- A great hero shot of the front.
- The full back and both sides.
- The top and the bottom.
- Close-ups of important details like brand tags, logos, fabric texture, or model numbers.
- An honest, well-lit photo of any flaws or damage. Don't hide them!
Never make a potential buyer guess about something. If you think they might have a question that a photo could answer, take the photo. Filling up that gallery shows you're a transparent and thorough seller, and that’s who people want to buy from.
Feeling overwhelmed by the clutter itself, before you even get to the photos? That's clutter paralysis, and it's real. DeclutterNow is the psychology-backed app that helps you start with trash to build momentum. Turn overwhelm into action. Try DeclutterNow free and see how simple it can be →