Getting your dorm room organized doesn't start on move-in day. The real work begins at home, before you even think about packing a single box. Trust me, I had boxes sitting for years in my parents' house, and finally facing that clutter before college saved me from the classic move-in day nightmare of trying to find space for stuff I didn't even need.
Conquer Clutter Paralysis Before You Pack
Ever stood in the middle of your room, surrounded by years of stuff, and just felt completely paralyzed? That feeling of not knowing where to start is totally normal. It’s not laziness—it’s a real thing called “clutter paralysis” or decision fatigue. You're so overwhelmed by the sheer number of decisions that you just get stuck.
The secret to breaking through that paralysis is to build momentum. Forget asking huge, emotional questions like, "Does this spark joy?" for every little thing. We're going to start with a much easier question: "Is this actual trash?"
Start With Trash, Build Momentum
I call this the "Trash First" methodology, and it’s a simple, psychology-backed trick to turn that feeling of overwhelm into action. Think about it—tossing a dried-up pen or an old receipt from two years ago takes zero mental effort. Each one of those quick wins gives your brain a little hit of dopamine, which is a reward that makes you want to keep going.
Suddenly, you’ve cleared all the obvious junk, and your room already feels lighter. That little bit of progress makes it so much easier to tackle the tougher decisions, like what to do with that hoodie you haven't worn since sophomore year. It's a surprisingly effective way to finally make progress. If you find you’re still getting bogged down, it's worth learning a few more tricks on how to overcome analysis paralysis and maintain your momentum.
This isn't about becoming a minimalist. It's about being intentional. Your dorm room has very limited space, and you want to reserve it for things that are actually useful, valuable, or genuinely important to you.
Your Pre-Packing Checklist
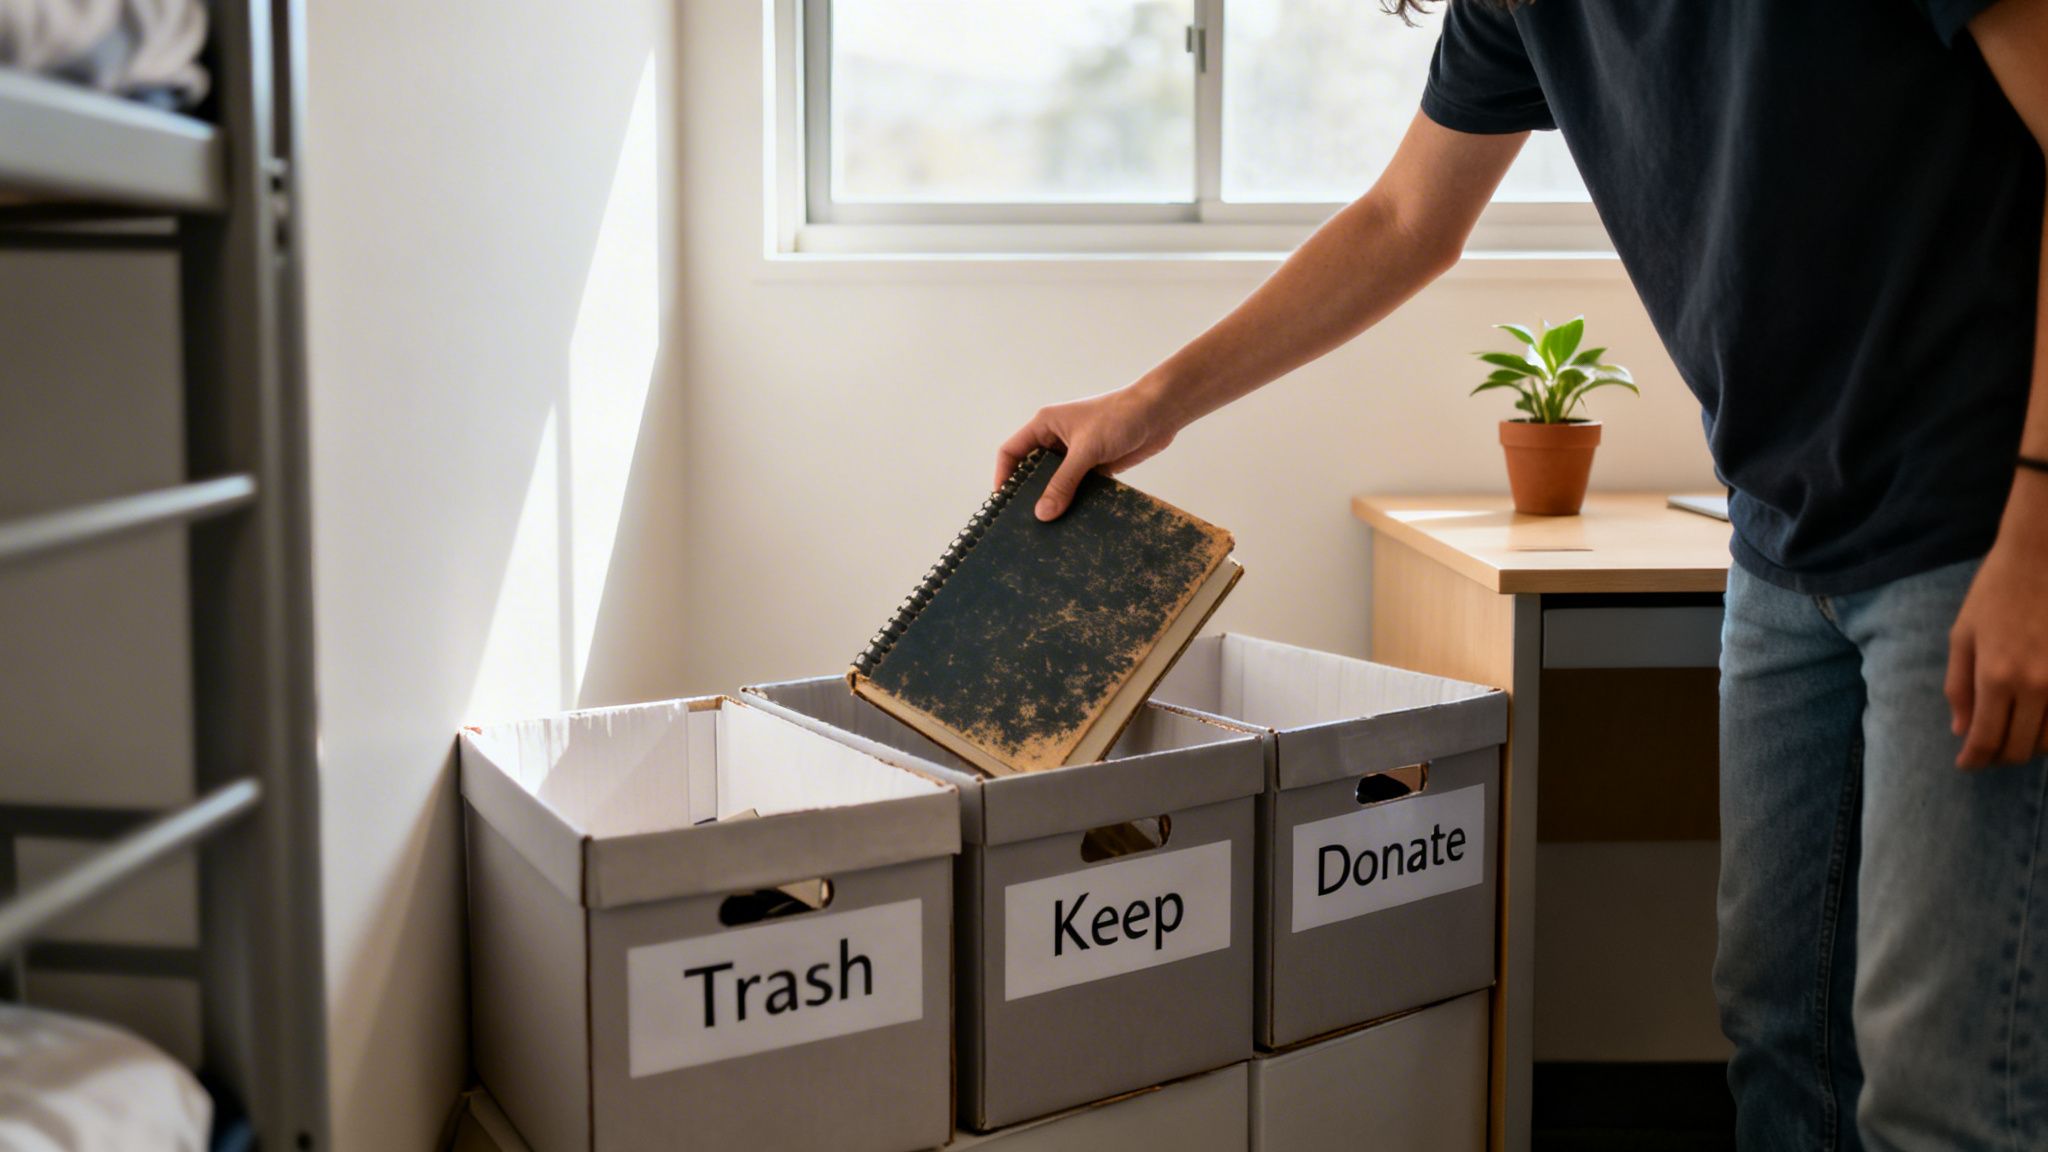
Ready to start? Grab a few trash bags or boxes. Label them: Trash, Donate/Sell, and Pack for College. Now, let's go for some quick wins. Work your way through this list:
- Obvious Trash: Broken phone chargers, old receipts, expired makeup—anything that’s clearly unusable. Just toss it.
- Old Schoolwork: Go through those piles of graded papers, old notebooks, and project printouts. Recycle what you don't need. Keep only the absolute essentials.
- Worn-Out Clothes: Be honest. That t-shirt with the permanent stain or the jeans with the torn seam? It's time for them to go.
- Unused Toiletries: Get rid of those nearly-empty shampoo bottles and the face mask you tried once and hated.
This first pass turns clutter paralysis into progress. It's the perfect setup for a smooth and successful packing process.
Mastering The Move-In Day Chaos
Move-in day is a controlled storm of boxes, parents, and nervous excitement. Without a solid game plan, it can quickly devolve into a high-stress puzzle where you can't find a single matching piece. The secret to organizing your dorm room effectively from the very first hour is to unpack with a strategy—one that builds a functional space, not just a pile of your belongings.

Your first move, and honestly the most critical one, is to pack a "First Day Essentials" box. Think of this as your survival kit. It should have everything you’ll need for the first 24 hours: bedding, a towel, toiletries, any medications, your phone charger, and a change of clothes. This single act of preparation saves you from frantically digging through every box just to find your toothbrush at 11 PM.
Your Unpacking Playbook
Once that essentials box is safely inside, fight the urge to just open boxes at random. Having an order of operations creates a calm, livable base camp right in the middle of the chaos.
I've seen this play out a hundred times: students who unpack methodically settle in faster and feel more at home from day one. Below is the exact sequence I recommend to every student to make move-in day less of a frantic scramble and more of a smooth transition.
Your Move-In Day Strategic Unpacking Plan
Follow this sequence to unpack efficiently and reduce stress on move-in day.
| Priority | Action Item | Why It Matters |
|---|---|---|
| 1 | Set Up Furniture & Define Zones | Get the big pieces—bed, desk, chair—in place first. This carves out your personal territory and prevents you from having to move heavy items later. |
| 2 | Make Your Bed Immediately | This is a huge psychological win. It instantly makes the room feel less like a storage unit and more like a home. It also gives you a clean surface to sit on. |
| 3 | Unpack Clothes & Closet Items | With the bed made, you have a large, flat area to work. Sort your clothes into the closet and drawers. Tip: Using slim velvet hangers can save a surprising amount of space. |
| 4 | Organize Your Desk & Study Area | Set up your laptop, plug in chargers, and arrange your school supplies. A functional study space is key to starting the semester strong. |
| 5 | Finish with Decor | Now for the fun part! Once the functional items are stored, you can hang posters, set up photos, and add personal touches that make the space yours. |
Following this simple order makes a world of difference. You go from a room full of boxes to a functional living space in just a few hours.
Real-Time Roommate Coordination
Move-in day is your very first test in shared-space living. To sidestep any immediate tension, you have to communicate. Don't just assume you get the outlet by the window or the closet on the left.
Have a quick, friendly chat before you even move the first box. A simple "Hey, which side do you prefer?" or "Are you cool if I put my desk here?" can prevent a semester's worth of quiet resentment. Be flexible and ready to compromise.
Investing this initial time pays off massively. Students who get their dorm organized from day one often see a 40% boost in productivity during their first semester. A clutter-free setup can also reduce decision fatigue by up to 35%, helping you focus on classes instead of your messy room. You can discover more insights about dorm trends and student success to get an edge.
Maximize Every Inch With Smart Storage Solutions
In a dorm room, the floor is lava. Okay, not literally, but every square inch of it is precious real estate you can't afford to waste. The secret to successfully organizing a dorm room is to think vertically and find clever ways to create storage out of thin air. This is where you have to get creative, moving beyond standard plastic bins and really making the room work for you.
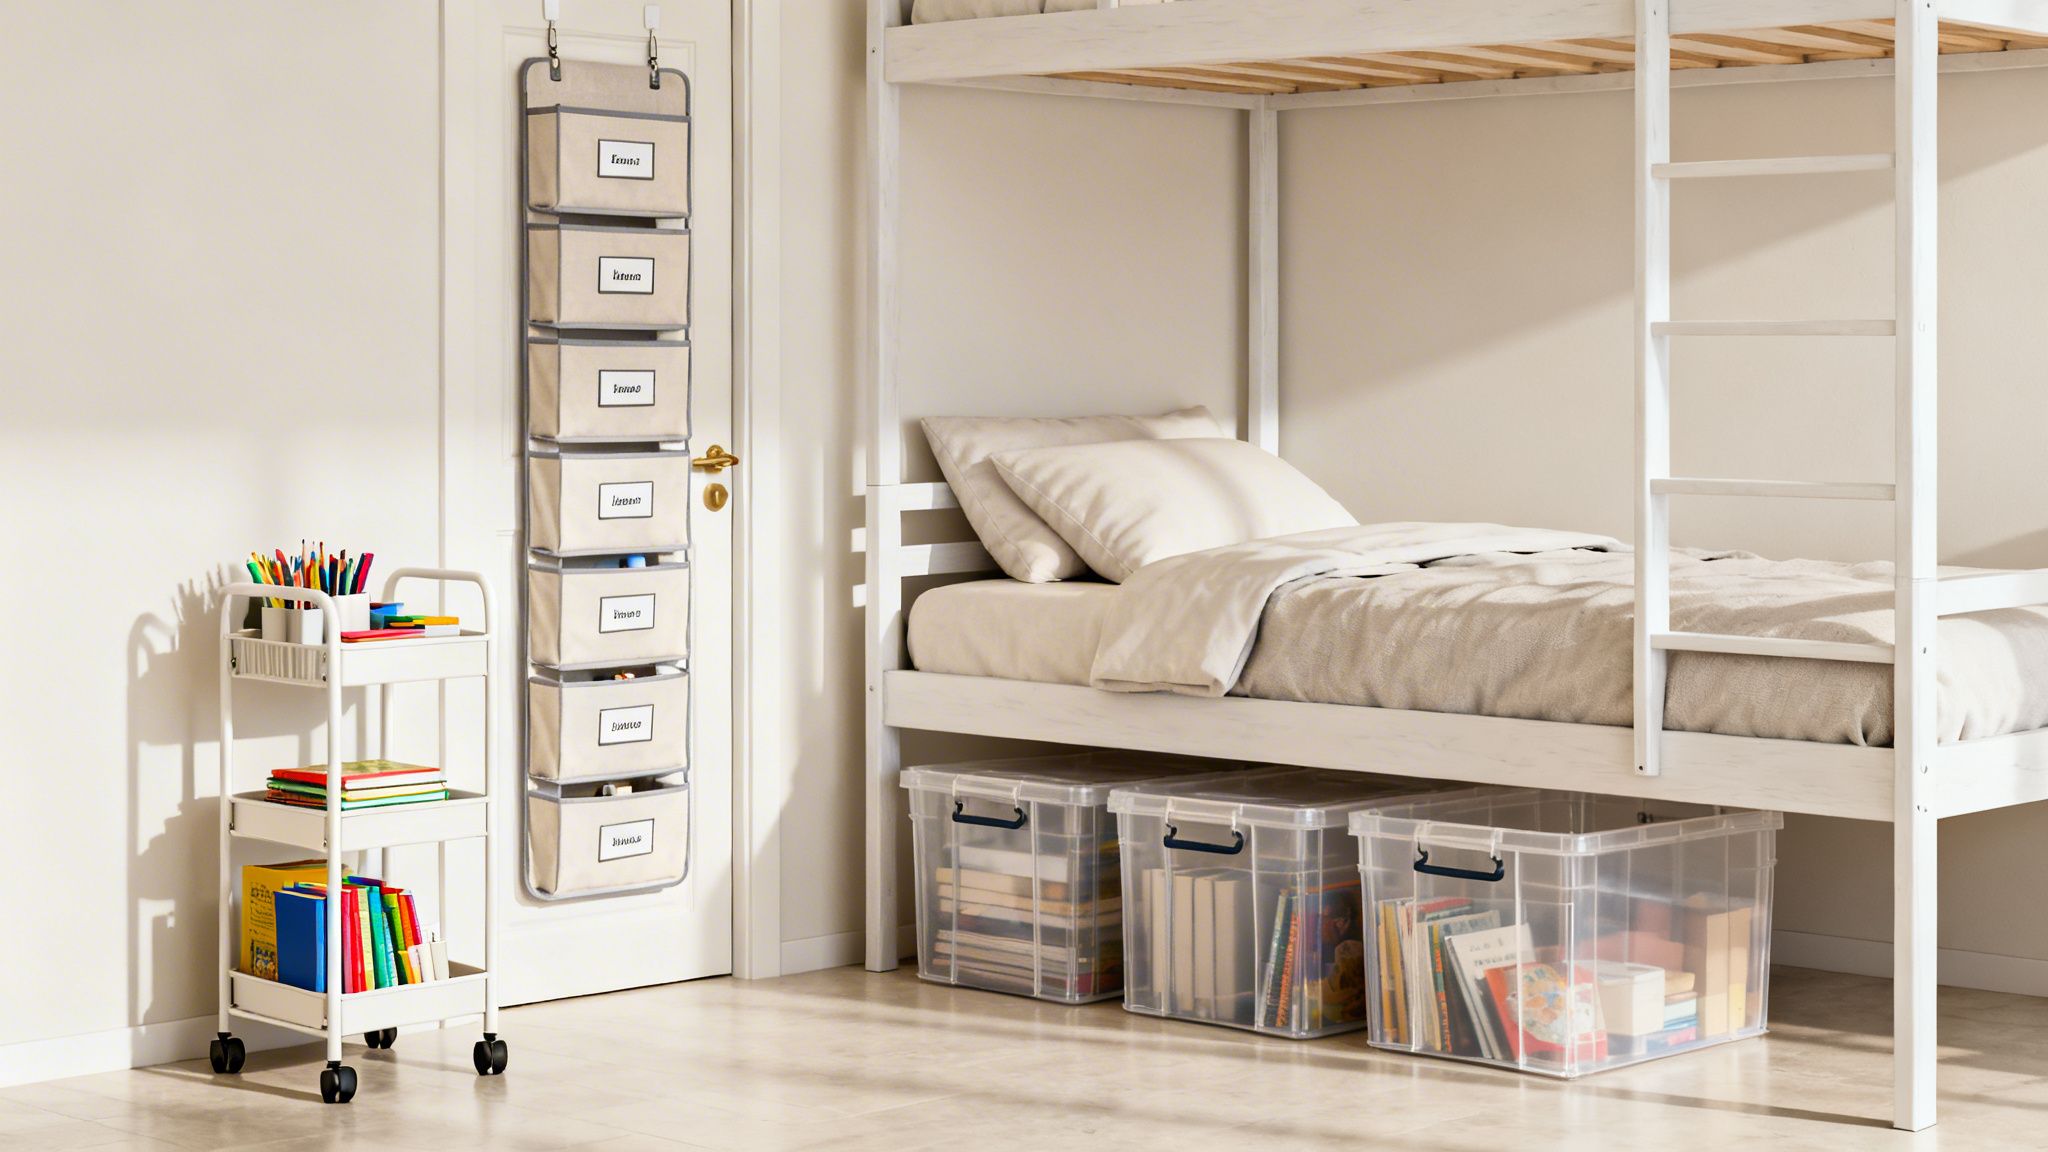
That empty space under your bed? It's a goldmine for stashing things you don't need every day, like seasonal clothes, extra bedding, or your backup supply of ramen. Don't just shove stuff under there, though. Grab some long, low-profile bins—ideally with wheels. They slide out easily, keeping everything organized and dust-free.
Go Vertical To Reclaim Your Space
Your walls and doors are your best friends in a tiny room. They offer up a ton of storage potential without eating up any of that coveted floor space.
- Over-the-Door Organizers: These aren't just for shoes. A clear-pocket organizer on your closet door can wrangle snacks, toiletries, cleaning supplies, or all those charging cables. A sturdy hook rack on the back of your main door is the perfect spot for towels, jackets, and backpacks.
- Tension Rod Shelving: Got an awkward nook or need an extra shelf in your closet without drilling holes? A simple tension rod can support lightweight baskets, giving you an instant shelf for folded sweaters or accessories.
- Slim Rolling Carts: A three-tier rolling cart is probably one of the most versatile things you can bring to college. It can be a mobile snack station, a study supply hub, or a bedside table that you can easily tuck away when you need the floor space.
If you really want to change the game, look into space-saving sleeping arrangements like bunk and loft beds. A loft bed frees up a huge area underneath for a desk, a comfy chair, or more storage drawers, effectively doubling your usable living space.
Key Takeaway: The goal here is to give every single item a designated "home." When everything has a place to return to, tidying up takes minutes, not hours—which is a lifesaver when you're juggling classes and a social life.
Multi-Functional Furniture Is a Must
Treat every piece of furniture as an opportunity for more storage. An ottoman that opens up to store blankets or a bedside table with drawers instead of just a flat top—these small choices make a massive difference.
This focus on smart storage is a booming business for a reason; the global dorm market shot up to $17.95 billion in 2023, largely driven by these kinds of innovations. For more specific ideas on taming your wardrobe, our guide on how to organize your dorm closet is a great place to start.
It makes sense when you think about it. With up to 70% of freshmen living in cramped dorms, it's no surprise that clever items like geometric storage units have seen a 25% jump in popularity. Making smart furniture and storage choices isn't just a trend; it's the key to a comfortable and functional dorm life.
Slay Your Clutter with the Four-Box Method
Alright, you’ve managed to get the big stuff—your bed, desk, and chair—roughly where they belong. But now you’re left staring at that pile. You know the one. It’s the mountain of “maybe” items you brought, and you have no idea where any of it is supposed to go.
This is where most people get stuck and just shove everything into a closet, but we're not going to do that. Instead, we’re going to use a simple but incredibly effective system called the Four-Box Method. This isn't about becoming a minimalist. It’s about making smart, quick decisions so your small space actually works for you.
Grab four boxes, bins, or just clear four distinct spots on your floor. Let’s get sorting.
Your Four Decluttering Zones
Each box has a specific job. This simple act of giving every item a destination makes the whole process feel less overwhelming and keeps you moving forward.
Keep: This pile is for the non-negotiables. Think semester textbooks, your go-to jacket, and your daily tech. Be ruthless here. If you decide to keep something, you must have a specific home for it. If you don't know where it will live, it doesn't belong in this box yet.
Donate/Sell: Got items that are perfectly good but just not right for you anymore? This is their new home. Maybe it’s a sweater that never quite fit right or a duplicate charging bank your roommate also brought. These things have value, just not to you, in this tiny room, right now.
Trash: This one’s the easy win. Expired snacks, broken chargers, old high school notes—anything that’s clearly junk goes straight in here. Don’t hesitate, just toss it and feel the instant relief.
Relocate: This box is a lifesaver for dorm living. It’s for all the stuff that doesn't belong here right now but you aren’t ready to part with forever. Think bulky winter coats when it's still August, sentimental keepsakes that take up too much desk space, or that "just in case" kitchen gadget you now realize you won't need until you visit home for Thanksgiving.
What to Do When You Get Stuck
Even with a great system, you’ll eventually pick up an item and just… freeze. That old concert t-shirt. The weird gift from your aunt. This is what I call "clutter paralysis," and it can kill your momentum.
When that happens, don’t just stand there agonizing. This is the perfect moment to pull out a tool like the DeclutterNow app.
Just snap a quick photo. The app’s AI will give you an objective suggestion on what to do—keep, sell, or toss—based on its potential usefulness and resale value.
It sounds simple, but getting that instant, unbiased opinion is like having a brutally honest friend on call. It breaks the spell of indecision, turns a roadblock into a quick, satisfying choice, and keeps you rolling toward a finally organized room.
Turn Unwanted Items Into Extra Cash
That "Donate/Sell" box you filled up while decluttering? Don't just give it all away—there's probably some hidden cash in there. Turning that pile of stuff you don't need anymore into a legit side hustle is easier than you think.
Think of it this way: every item you sell is basically free money for late-night pizza, concert tickets, or just a little less financial stress. And you don't have to be a marketing genius to do it.
What's Actually Worth Selling?
Before you start snapping pictures of everything, you need to know what people will actually buy. You’ll have the best luck with items that are in decent shape and have some demand.
Here’s a quick list of dorm-room gold:
- Textbooks: This is the big one. If you’re done with a class, get that textbook listed ASAP before a new edition comes out. A single used textbook can easily net you $40 or more.
- Electronics: Old phones, gaming controllers, headphones, or even that extra-long charging cable you never use can sell surprisingly fast.
- Brand-Name Clothing: That hoodie you wore twice or those sneakers that weren’t quite your style? If they're from a popular brand and still look good, they have resale value.
- Dorm Decor: Things like string lights, cool posters, or unique storage bins are often sought after by other students looking to decorate on a budget.
The key is to be realistic. A stained t-shirt probably won't sell, but a lightly used North Face jacket definitely will.
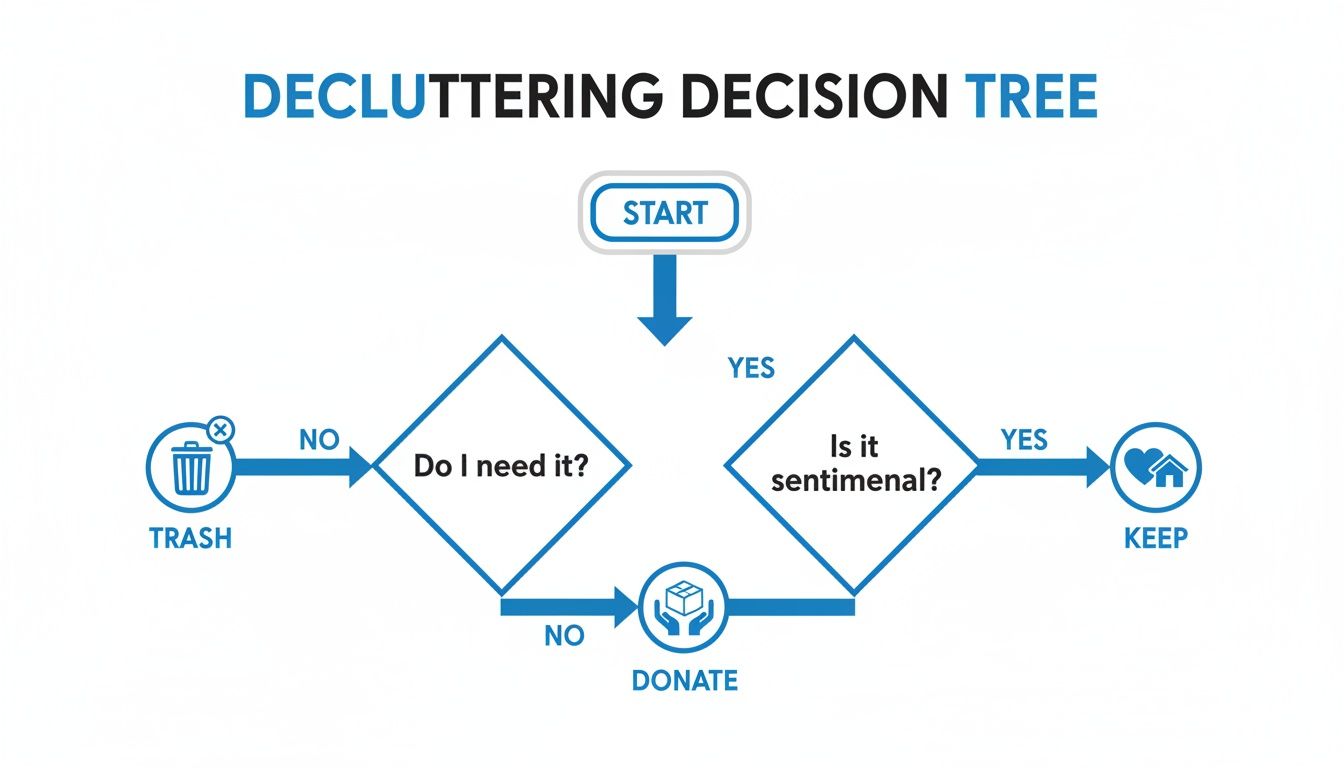
This decision tree nails it. When you're sorting, that first question—"Do I need it?"—is your fastest filter. If the answer is no, you can decide whether to sell, donate, or trash it in under 10 seconds.
A Quick And Dirty Guide To Selling On eBay
Once you’ve picked out your items, you need a simple process to get them listed without it feeling like a chore. I've found that setting up a mini "shipping station" in a corner of my room with a few mailers, tape, and a scale makes the whole thing much faster.
Here's a simple table to walk you through the process.
Quick Guide to Selling Your Dorm Clutter
| Step | Action | Pro Tip |
|---|---|---|
| 1. Photos | Take clear pictures of your item from all angles in good light. | A plain white sheet of paper or a poster board makes a great background. It looks way more professional. |
| 2. Listing | Write an honest title and description. Mention the brand, condition, and any flaws. | Think like a buyer. What keywords would you search for? Use those in your title. "Gently Used Hydro Flask" is better than "Water Bottle." |
| 3. Pricing | Search for your item on eBay and filter by "Sold Items" to see what it's actually selling for. | Price it competitively. If you want a quick sale, price it a dollar or two below the average. An auction format can also create a bidding war for popular items. |
| 4. Shipping | Once it sells, pack it up securely and print your shipping label. | Save the padded envelopes and boxes you get from your own online orders! Reusing them saves money and is better for the environment. |
That's really all there is to it. Once you get a rhythm down, you can list an item in just a few minutes.
I talked to one student who made over $200 in a single semester just by selling things they weren't using anymore. They said it wasn't just about the money—it was a huge confidence boost.
It’s all about building a simple habit. Set aside 30 minutes every Sunday to list one or two new things. Before you know it, you'll have a steady trickle of extra cash coming in.
For a deeper dive, check out our guide on selling unwanted items online. It's packed with more advanced strategies and examples of listings that sell.
Start tonight. Grab one thing from your "Sell" pile and get it listed. You might be surprised how good it feels to turn that clutter into cash.
Keep It That Way: Your 15-Minute Weekly Reset
You did it. You survived the move-in chaos, wrangled the clutter, and finally carved out a dorm room that feels like a genuine retreat. But let’s be honest—between cramming for exams, a social life, and sheer exhaustion, how do you keep it from looking like a disaster zone by week two?
Here’s the secret: you don’t need another weekend-long cleaning marathon. The real trick to staying organized is building tiny, almost effortless habits into your routine. Forget perfection; we’re just aiming for progress. A quick 15-minute routine once a week is all you need to keep the clutter from taking over.
Set Up a Landing Zone
First things first, create a "home" for the stuff you carry every single day. This is your landing zone—a small tray, a cool bowl, or even just a designated corner of your desk right by the door. This is where your keys, student ID, and wallet live.
The second you walk in, drop them in their spot. This one tiny habit takes about 10 seconds and completely eliminates that morning panic when you're late for an 8 a.m. lecture and can't find your keys.
The Five-Minute Nightly Tidy-Up
Before you collapse into bed, set a timer on your phone for just five minutes. This isn't about deep cleaning; it’s a super-fast reset to clear your head and your space.
- Toss the trash: Get rid of those snack wrappers, empty soda cans, and junk mail.
- Put one thing away: Is there a textbook on your pillow? Move it to your desk. A hoodie slung over your chair? It takes two seconds to hang it up.
- Wipe one surface: A quick once-over on your desk or nightstand with a wipe can make the whole room feel cleaner.
Doing this consistently stops tiny messes from snowballing into overwhelming piles. It's a small price to pay for waking up to a calm, ready-for-the-day room.
"A weekly reset is non-negotiable. I put it on my calendar like a class. Sunday at 4 PM, I spend 15 minutes doing laundry, clearing my desk, and prepping for the week. It keeps my space and my head clear."
Your Ten-Minute Sunday Reset
Pick a time on Sunday—maybe before you settle in for some Netflix—and dedicate just ten minutes to a room reset. Put on a good podcast or your favorite get-it-done playlist and just power through these few tasks:
- Tackle the laundry situation: Round up all the dirty clothes and toss them in the hamper. If you have clean laundry sitting in a basket, get it folded and put away.
- Clear your flat surfaces: Desks, dressers, and even the floor are absolute clutter magnets. Take a few minutes to put things back where they belong.
- Glance at your week ahead: A quick look at your calendar or planner helps you mentally prep for what’s coming, which is a surprisingly effective way to cut down on weekday stress.
And that’s really all it takes. By weaving these tiny habits into your week, you make sure your dorm stays a functional, relaxing sanctuary for both studying and chilling out.
For even more great ideas on keeping small spaces in check, take a look at these fantastic tips on dorm room organization.
Got Questions About Dorm Room Organization? We've Got Answers.
Even the most organized student runs into a few snags when sharing a small space. From navigating roommate differences to figuring out where to stash your winter coat, these are the questions we get all the time—and our best advice for tackling them.
My Roommate and I Have Totally Different Cleaning Styles. Help!
This is probably the single most common dorm room dilemma. The secret? Talk about it before you get frustrated. It's not about pointing fingers; it's about finding a middle ground that works for both of you.
Start by setting a few simple ground rules everyone can agree on. Maybe it's a "no dishes in the sink overnight" policy or a quick 10-minute joint tidy-up every Sunday night. Focus on the shared spaces first, like the entryway or the micro-fridge area. Keeping those high-traffic zones clear makes the whole room feel cleaner and prevents small annoyances from escalating into a full-blown conflict.
Where Am I Supposed to Store All My Seasonal Stuff?
Your tiny dorm closet is prime real estate—don't waste it on things you won't be wearing for months. Vacuum-sealed bags are your best friend here. They're perfect for squishing down bulky winter jackets, heavy sweaters, and extra blankets to a fraction of their size.
Once they're compressed, slide them into a low-profile bin that fits right under your bed. Out of sight, out of mind. This frees up so much space for the clothes you’re actually wearing right now.
Do I Really Need to Splurge on Fancy Organizers?
Honestly, no. While some organizing gadgets look cool on Instagram, you can get the exact same results with some creative, budget-friendly hacks. Think outside the box!
An over-the-door shoe holder is fantastic for storing snacks, toiletries, or cleaning supplies. A simple tension rod can instantly double your hanging space or create a new "shelf" in a cabinet or closet. The goal is to build a system that works for you, not to buy the most expensive bins on the market.
Feeling paralyzed by those last "keep or toss" decisions? That's what DeclutterNow was built for. Our AI helps you break through decision fatigue so you can finally make progress.
Try DeclutterNow free →